Update 2022/12/18
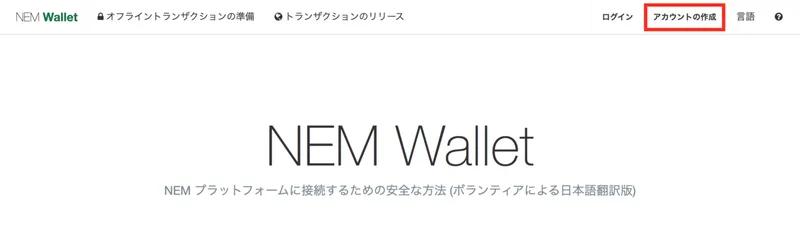
Introducing NEM Wallet
This article will show you how to create a NEM Wallet account.
table of contents
- Wallet download
- How to create an account
- How to create with Simple Wallet
- How to create a private key wallet
- Feature introduction
Download wallet
Go to the latest wallet here page.
Scroll down a bit and you'll see an area labeled
Assets with download links.
Download the file for your OSFor Linux OS
- NEM-Wallet-linux-amd64-x.x.x.deb
- NEM-Wallet-linux-amd64-x.x.x.snap
- NEM-Wallet-linux-x64-x.x.x.tar.gz
For Mac OS X users
- NEM-Wallet-mac-x.x.x.dmg
For Windows users
- NEM-Wallet-win-x.x.x.exe
About the Universal version
- NEM-Wallet_x.x.x.universal.zip
There is also an OS-independent form of his Wallet. However, as a general rule, use a version other than the Universal version, and use this when you have no choice. Downloading will download the file in ZIP format. Please expand this.
Among the extracted files, there is a file called start.html. Click this to open your wallet.
How to create an account
First, click Create Account.
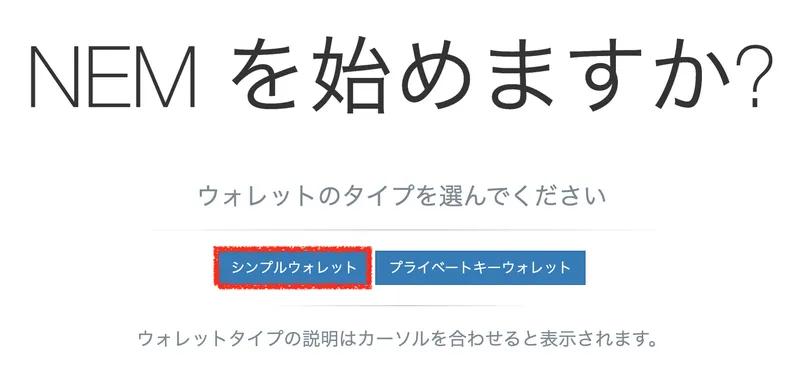
How to create with Simple Wallet
Here's how to create one for those who don't have a private key.
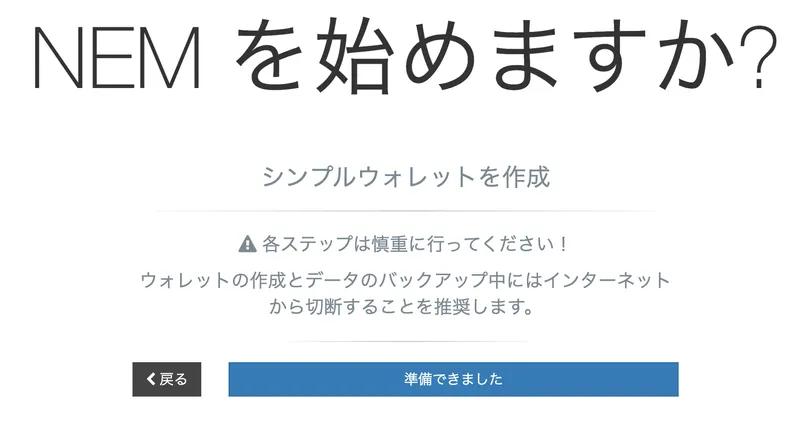
Click "I'm ready"
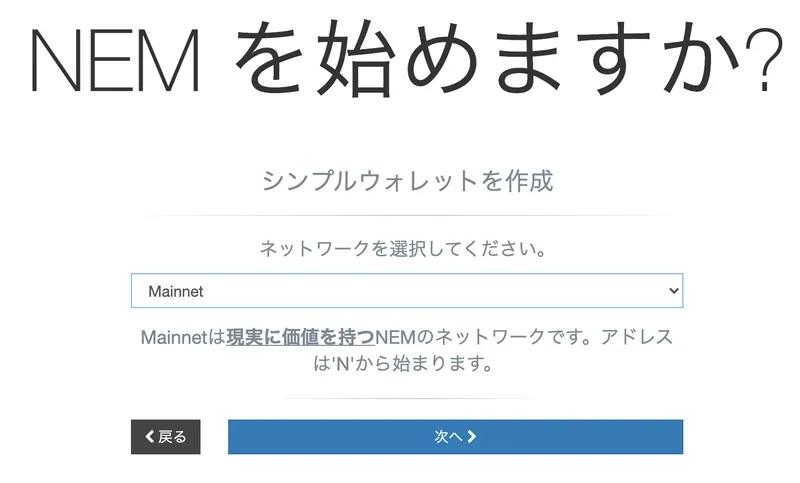
Select Mainnet and click "Next"
Decide on the name of the wallet you want to create.
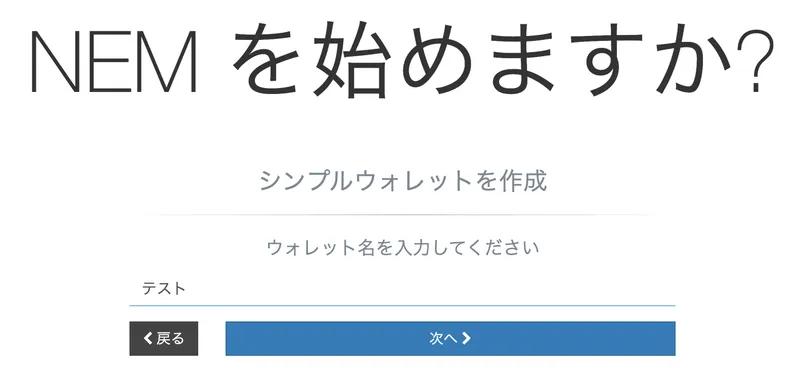
Please choose a password.

Click "Start".
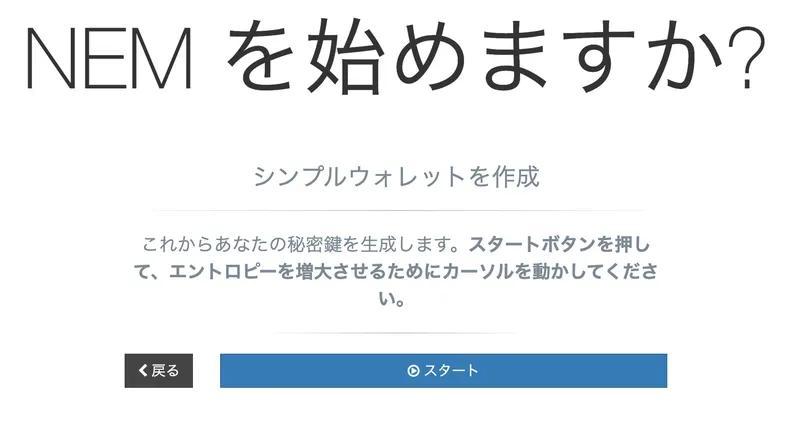
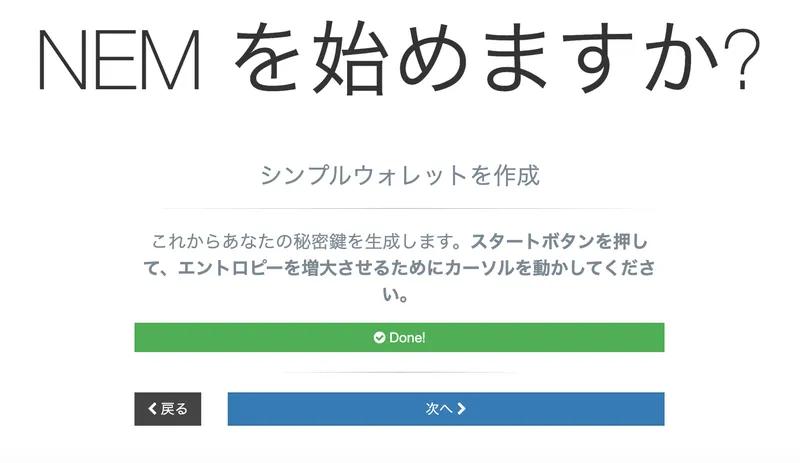
Move the mouse anyway until the green gauge is 100 percent.

When the gauge reaches 100%, the following screen will appear. Click "Next" here.
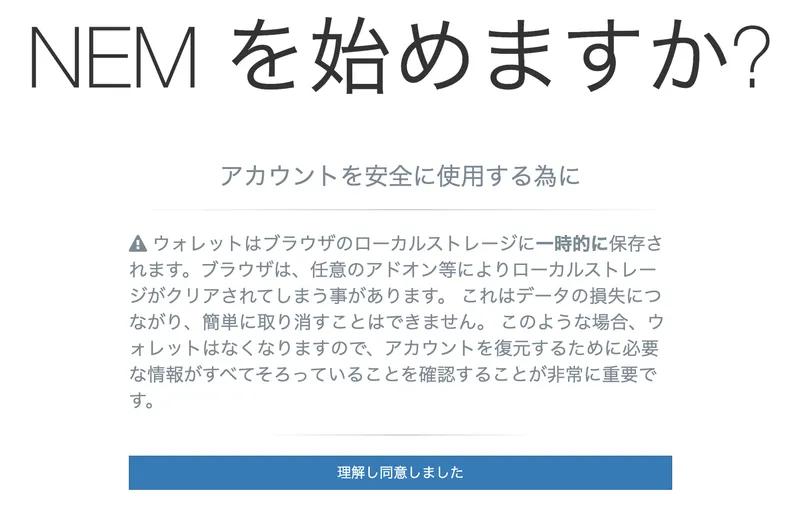
Click "I agree".
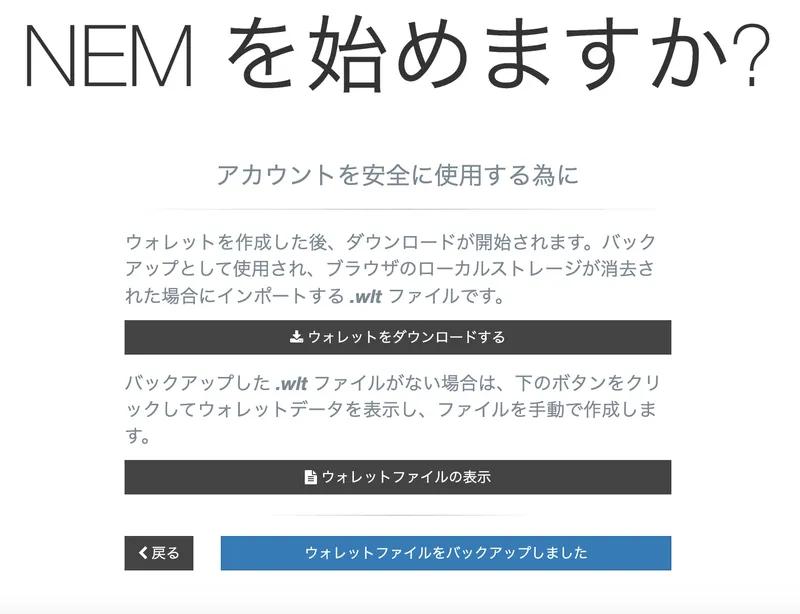
Click "Download Wallet" to download the wallet file.
This is required for wallet backups and loading wallet data into the NEM Wallet. After the download is complete, click "I have backed up my wallet files".
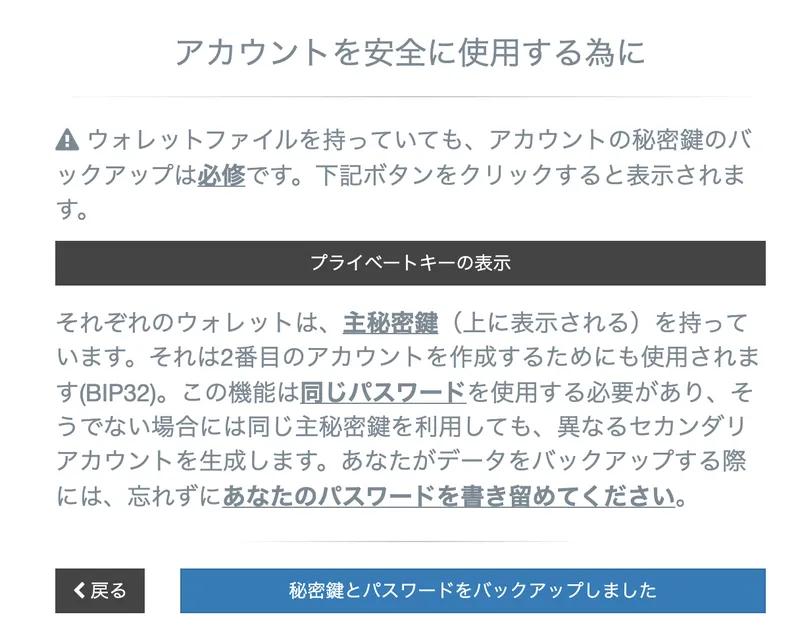
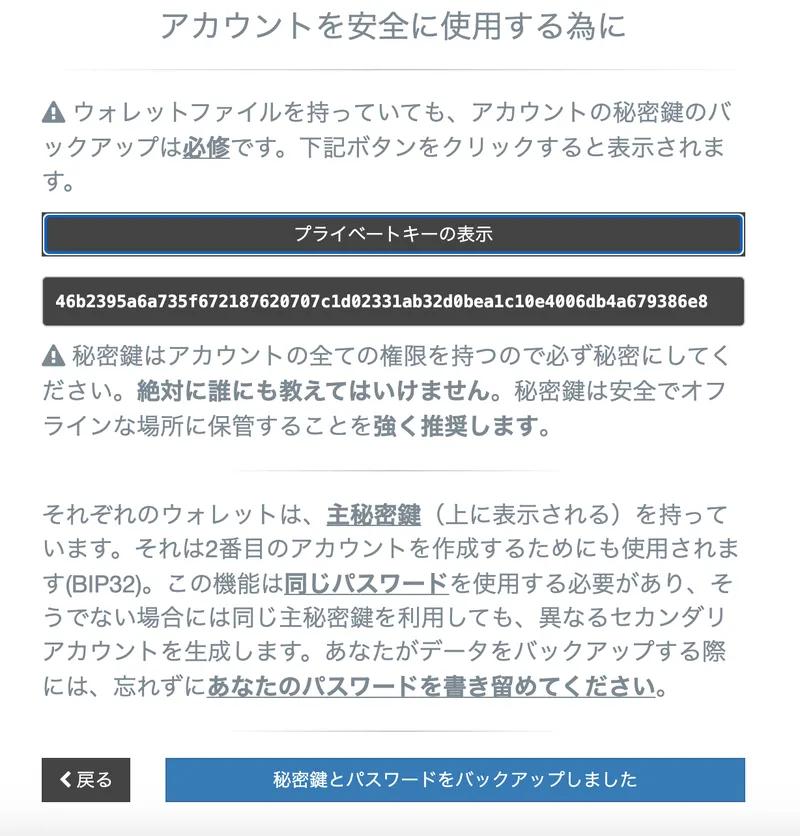
Click "View private key".
The private key is displayed as below.
Never show your private key to anyone. (Shown specially here to teach you how to create a wallet)
After making a note of this private key, click I have backed up my private key and password.
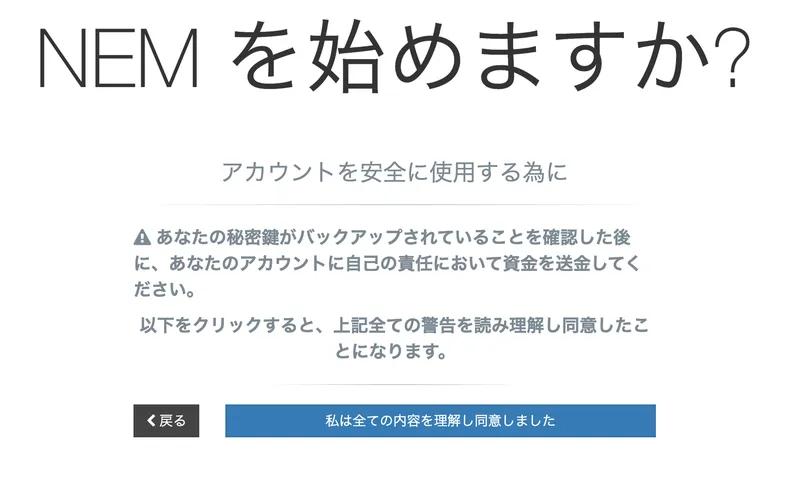
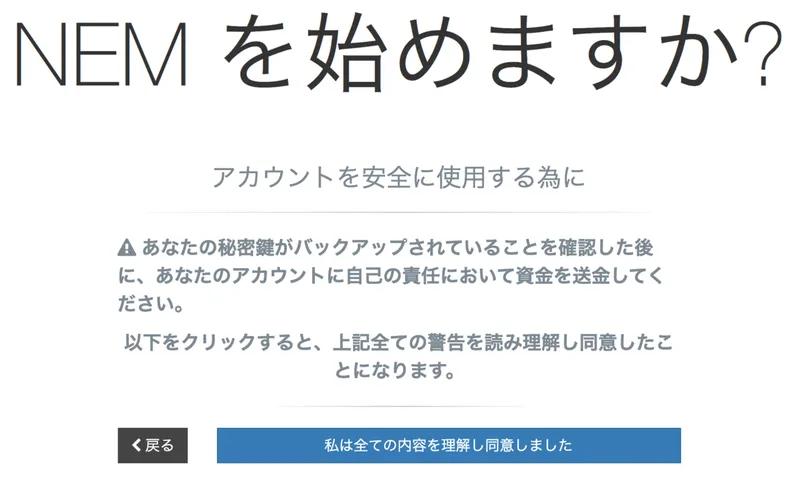
Click "I understand and agree to all terms".
Once you've made a note of your NEM address here, click 'Login'.
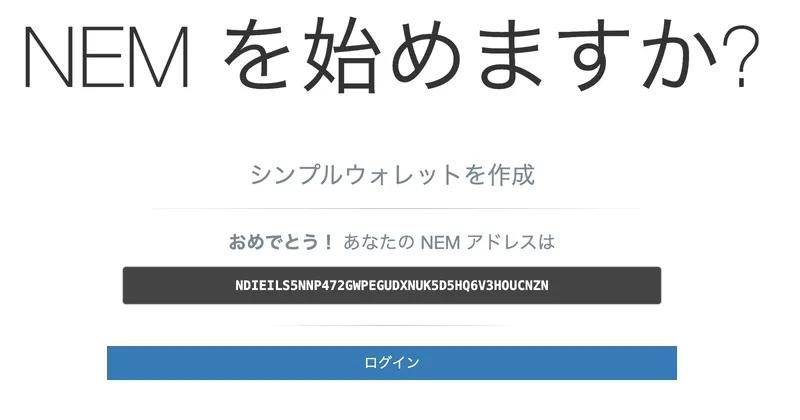
Here, the account creation of NEM Wallet is completed.
Click Login to return to the first screen below. Here, you can log in by selecting the wallet name that you have decided in the wallet selection, entering the password according to it, and clicking "Sign in".

You can check your balance and remittance history by logging in. If it is not displayed, it may be displayed by changing the connected node, so please try it.
In this way, a person who already has a private key can also create a wallet.
Also, if you have lost your wallet password or want to change your wallet name, you can use the above method to recreate your wallet while leaving your balance.
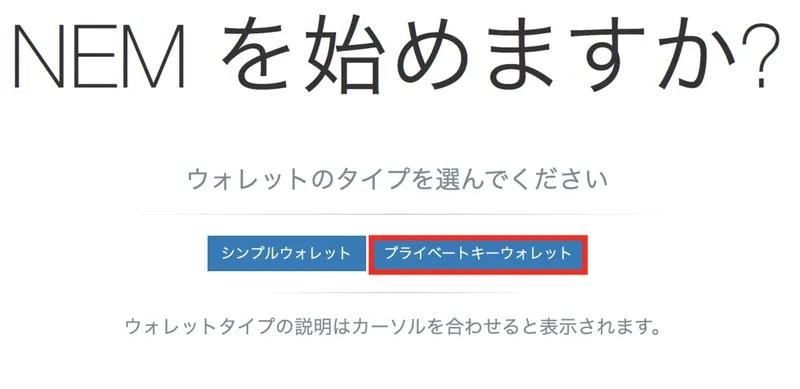
How to create a private key wallet
Here is the creation method for those who have a secret key. Click Private Key Wallet.
Click where it says "Ready".

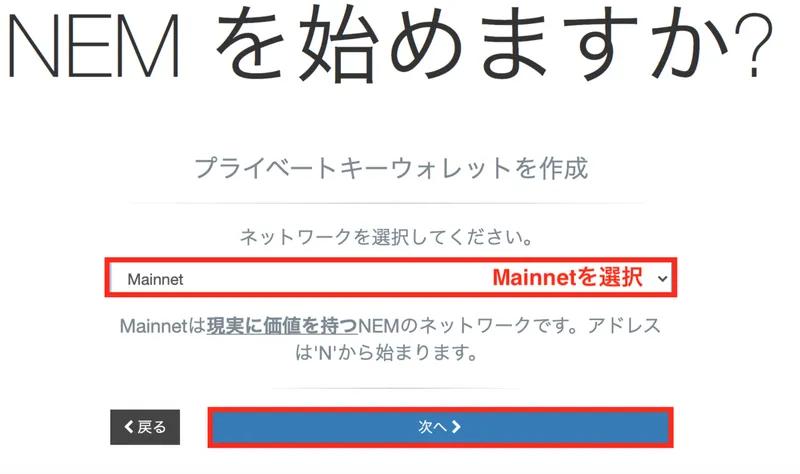
Select Mainnet for the network, then click Next.
Choose your own wallet name and enter it, then click "Next".

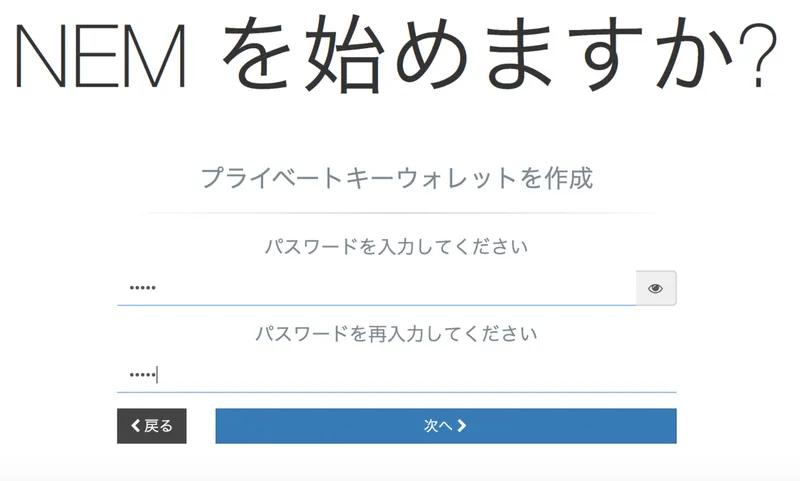
Please choose a password.
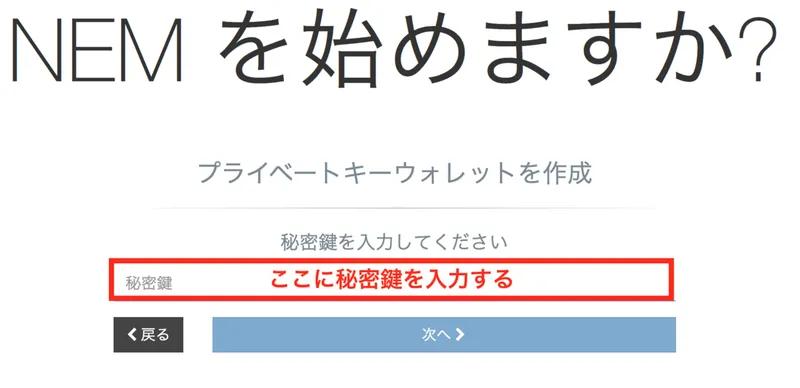
Please enter the private key that you have on hand.
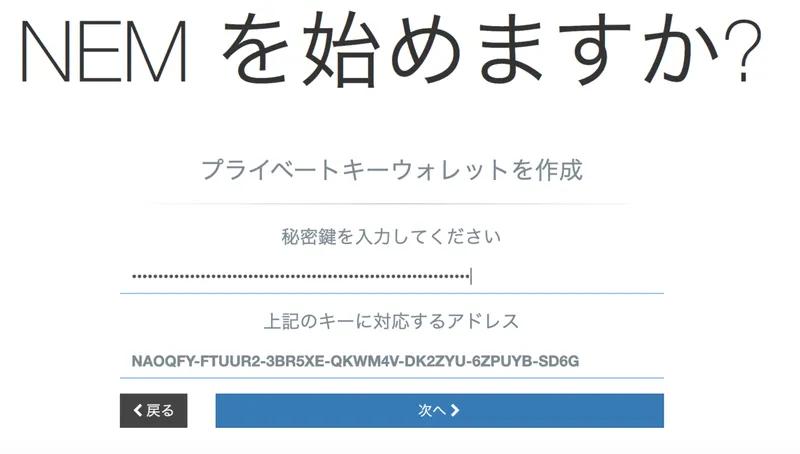
Once you have entered your private key, you will automatically be brought to this screen.
Click "Next".
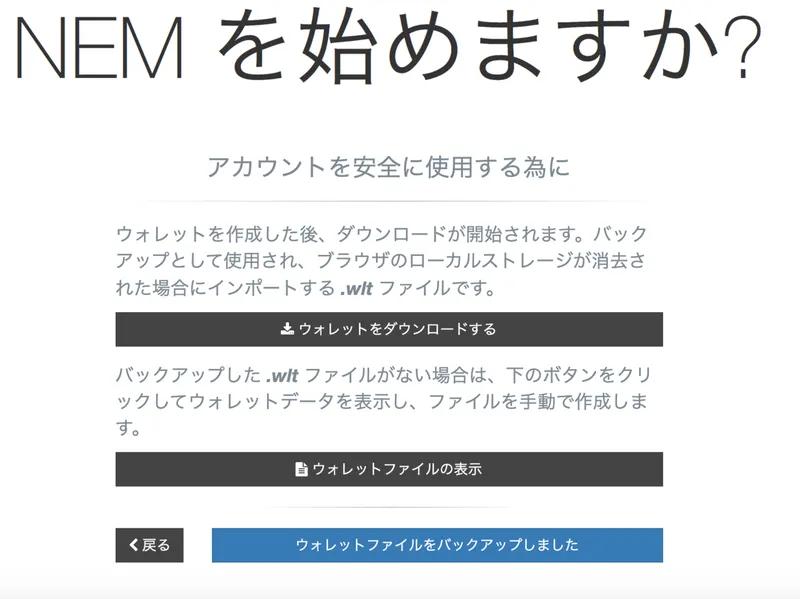
Click Download wallet file to download the wallet file.
Then click the blue button that says "wallet file downloaded".
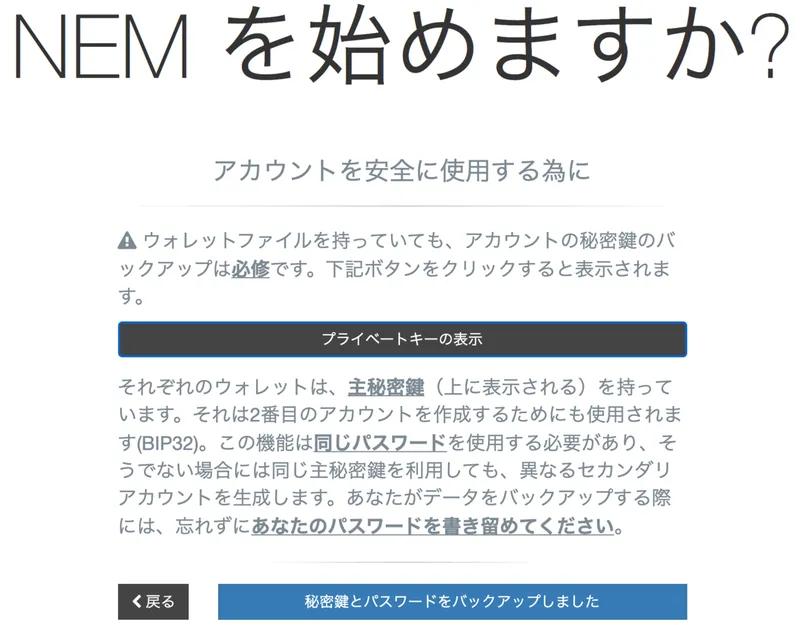
Since you already have the private key, you can skip displaying the private key.
So here, click the blue button that says "Private key and password backed up".
Click the blue button that says "I understand and agree to all of the terms".
Click where it says "Login".

Here, the account creation of NEM Wallet is completed.
Then the following screen will appear.
For wallet selection, select the wallet named by you.
In Password, enter your wallet password.
When the above two points are completed, you can click "Sign in", and when you click it, the following screen will appear and you can fiddle with the wallet.
In this way, a person who already has a private key can also create a wallet.
Also, if you have lost your wallet password or want to change your wallet name, you can use a private key wallet to recreate your wallet while leaving your balance.
Feature Introduction
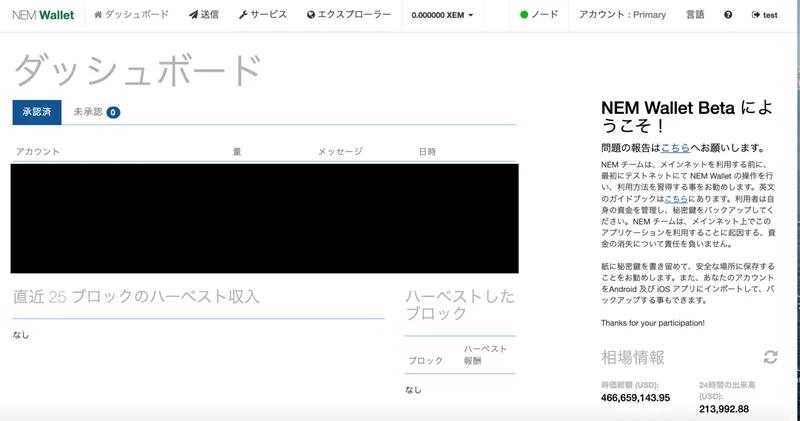
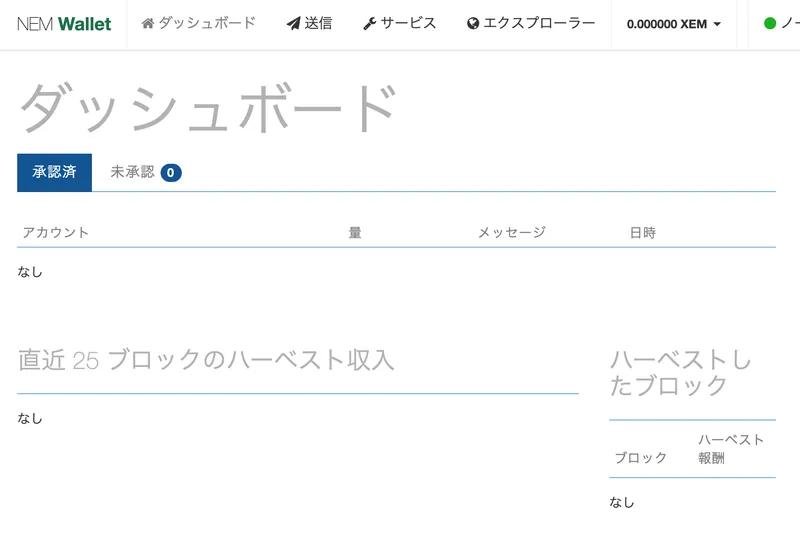
Dashboard
You can check your remittance history on the dashboard.
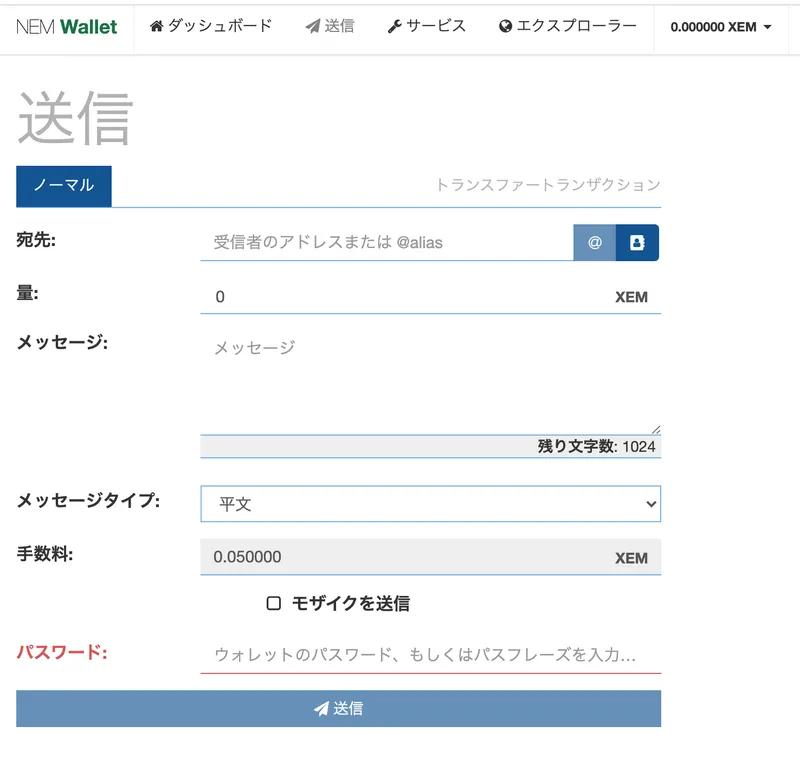
send
When sending, you can specify the address you want to send XEM or Mosaic to. You can also send money with a message attached.
service
You can set multisig, namespace, delegate harvest, create mosaic, etc.

Explorer
You can check the namespace you have, the type of mosaic, etc.

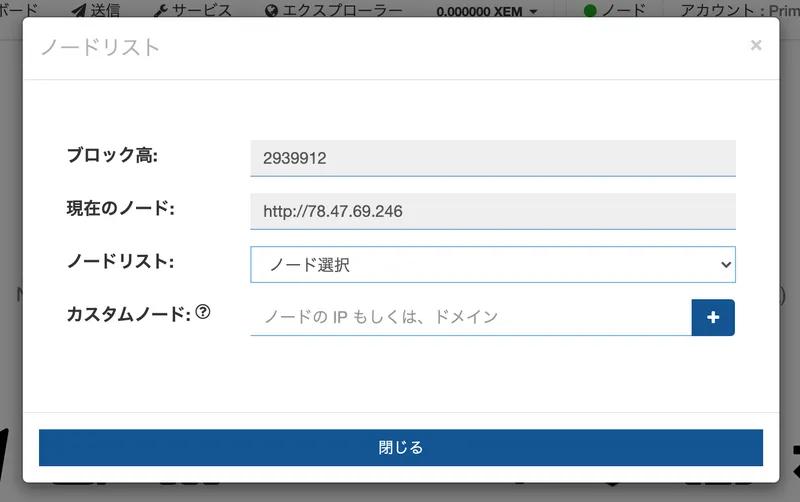
nodes
You can change the node connected to the wallet by clicking where it says node.
If the wallet balance is not reflected, changing the node may reflect the balance.
account
In Account, you can check account information such as address and public key, check private key, and download wallet file.
